Introduction to Custom Blythe Dolls
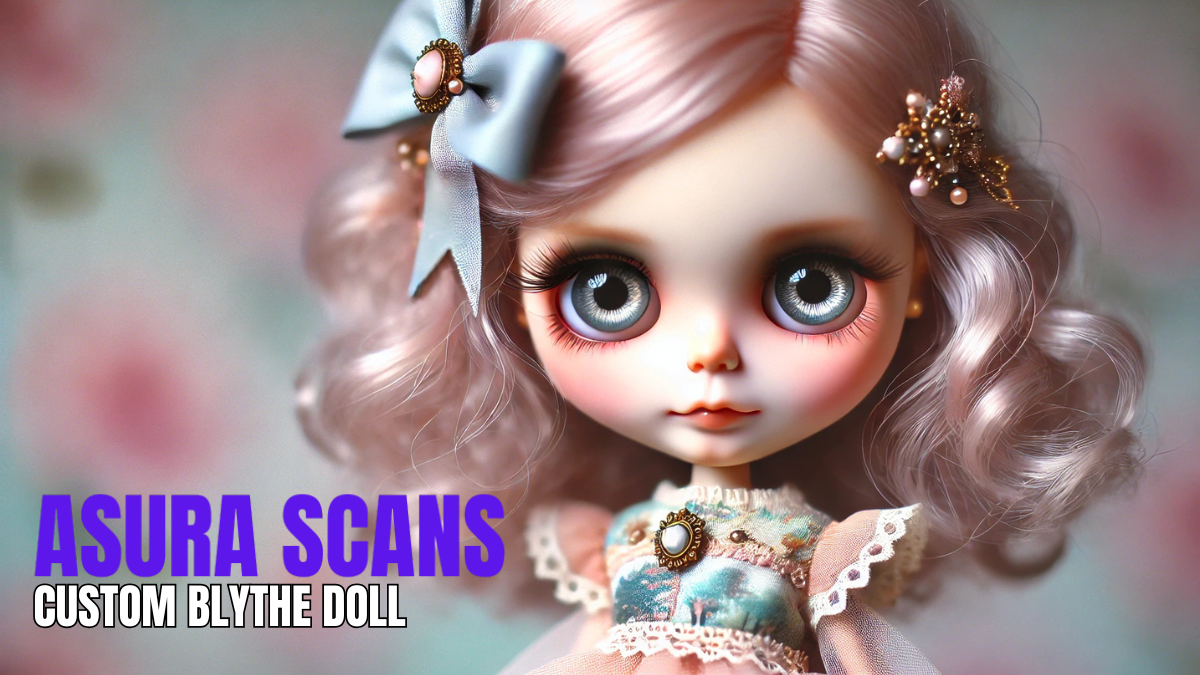
Blythe dolls are more than just toys; they are a canvas for creativity and an iconic symbol in the doll-collecting world. With their oversized heads, expressive eyes, and unique charm, custom blythe doll have captured the hearts of collectors and artists worldwide. Among these enthusiasts, custom Blythe dolls have emerged as a growing trend, allowing individuals to transform standard dolls into personalized works of art.
Custom Blythe dolls are highly sought after for their individuality and the creativity they represent. From intricate facial carvings to handcrafted outfits, every detail tells a story. This customization allows owners to create a doll that reflects their style, interests, or artistic vision. Whether you are an avid collector or a creative soul looking to explore a new hobby, crafting a custom Blythe doll is a rewarding experience.
Understanding the Customization Process
Selecting the Base Doll
The journey to creating a custom Blythe doll begins with selecting the right base doll. Blythe dolls come in various types, including Neo Blythe, Petite Blythe, and Middie Blythe. For customization, Neo custom blythe doll are often the most popular due to their larger size and more detailed features.
When choosing a base doll, consider its features, such as hair type, skin tone, and face mold. These factors will influence the customization process and the final appearance of your doll. Beginners may opt for dolls with simpler designs, while experienced artists might choose a doll that offers more room for creative expression.
Tools and Materials for Customization
Customizing a Blythe doll requires a variety of tools and materials. Essential items include precision carving tools, sandpaper, acrylic paints, pastel powders, and sealants. For modifying the doll’s eyes, you’ll need replacement eye chips, glue, and tweezers. Hair customization may require wigs, synthetic hair, or rerooting tools.
Having the right tools is crucial to achieving professional results. Invest in high-quality materials to ensure durability and precision during the customization process. Additionally, setting up a well-lit and organized workspace will make your creative journey smoother and more enjoyable.
Step-by-Step Customization
The customization process involves several steps, each requiring patience and attention to detail:
- Preparing the Doll: Begin by disassembling the doll, cleaning its parts, and sanding the faceplate to remove the factory finish. This step provides a smooth canvas for carving and painting.
- Face Sculpting and Painting: Use carving tools to add unique features to the doll’s face, such as a smile, dimples, or other expressions. Next, paint the face using acrylics or pastels, adding details like blush, freckles, and makeup.
- Eye Modification: Replace the doll’s default eye chips with custom ones to give it a distinctive look. Experiment with different colors and designs to enhance the doll’s personality.
- Hair Customization: Reroot the doll’s hair using synthetic strands or attach a wig for a completely new hairstyle. Styling options range from classic bobs to intricate braids.
- Adding Final Touches: Dress the doll in custom outfits and accessories that complement its theme. These finishing touches bring your artistic vision to life.
Inspiration and Design Ideas
Custom Blythe dolls are a celebration of creativity, and the possibilities for design are endless. Popular themes include vintage, fantasy, and cultural styles. For example, some artists draw inspiration from fairy tales, creating ethereal dolls with flowing gowns and delicate wings. Others may craft dolls inspired by specific cultures, incorporating traditional clothing and accessories.
Exploring color palettes and patterns can spark fresh ideas. Pastel tones evoke a whimsical feel, while bold hues create a dramatic effect. To stay inspired, browse online communities, social media, and exhibitions featuring Blythe doll artists. Remember, originality is key, so don’t hesitate to experiment with unconventional themes.
Showcasing and Caring for Your Custom Blythe Doll
Display Options
Once your custom Blythe doll is complete, it deserves a display that highlights its unique features. Consider using doll stands, glass cases, or themed dioramas to showcase your creation. A well-designed display not only protects your doll but also enhances its visual appeal.
Photography Tips
Photography is an excellent way to capture the charm of your custom Blythe doll. Use natural lighting to highlight its intricate details, and experiment with different angles and backgrounds. Props and themed setups can add depth and context to your photos, making them more engaging.
Maintenance and Care
To keep your custom Blythe doll in pristine condition, follow a few maintenance tips. Store it in a cool, dry place away from direct sunlight to prevent fading. Clean the doll gently with a soft cloth and avoid using harsh chemicals. Regular maintenance will ensure your doll remains a treasured piece for years to come.
Conclusion
Creating a custom Blythe doll is a fulfilling journey that combines artistry, patience, and imagination. Each doll is a unique expression of its creator’s vision, transforming a standard toy into a cherished masterpiece. Whether you’re a seasoned collector or a newcomer, the world of custom Blythe dolls offers endless opportunities for creativity and personal connection.
By following the steps outlined in this guide, you can craft a doll that reflects your style and storytelling. Embrace the process, let your imagination soar, and enjoy the rewarding experience of bringing your custom Blythe doll to life.
Also Read: justin jefferson wallpaper